Guide for Making Indoor Gardens with Young Gardeners
ABCs of PLANTING SEEDS AND TRANSPLANTING SEEDLINGS
(LITTLE PLANTS)
PLANTING SEEDS
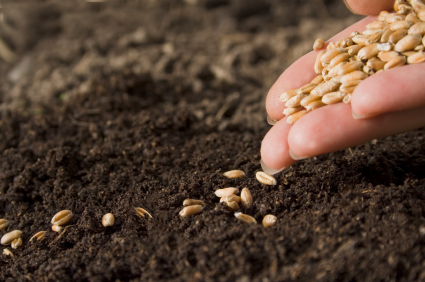 The most common mistake people make when planting seeds is to push them too deeply into the soil. The rule of thumb is to plant a seed twice as deep as it is thick. This means that most of your seeds will be placed between ¼ inch and ½ inch deep.
- To plant seeds, fill planting container with dirt. Do not fill to the top or water and soil will spill out when you water. Make a hole in the dirt in the center of the pot twice as deep as the thickness of your seed. Place seed in the hole and lightly press dirt over the hole.
- Water until the soil is thoroughly moist. It is vital that newly planted seeds do not dry out. If they do, they will not grow. Check each day to see if soil is moist by pushing your finger into soil near the side of the planter.
TRANSPLANTING SEEDLINGS (Little Plants)
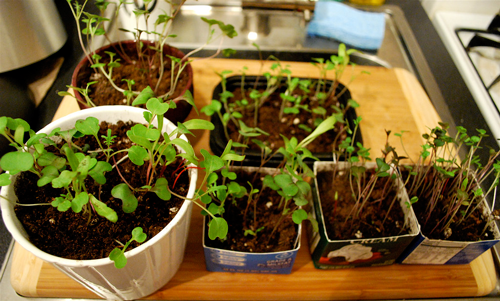 All growing plants need room to grow. There are a few species of flowers that seem to do better indoors when their roots fill their containers – but not the herbs, flowers and vegetables that you will grow. When you start to see roots coming out of the holes in a container, OR, when the green leaves of the plant start to fall over its container, it is time to put the plant into a larger container. This is called “transplanting".
- If you are transplanting from a peat pot, you do not have to remove the plant from the container. Instead, gently break the sides and bottom of the peat planter and place the entire pot with the plant still in it into the new container.
- Select a new container that is at least 3 times the size of the original container. Make sure the container has drainage holes in the bottom and a thick layer of gravel. Fill with soil to within 1-2 inches of the top.
- To transplant seedlings (little plants), place your hand over the planting container and slide your fingers around the stem of the plant. Turn the container upside down and tap until the plant and its root ball (roots and clump of dirt) slide free. If you are using a very large container, you will probably not be able to turn it upside down. Instead, turn it on its side and whack until loose or use a small shovel (spade) to loosen soil from the side of the container. When loose, lift out the root ball (do not pull on the stem).
- Make a hole large enough for the entire root ball to fit into the new container and place plant into the hole. Cover with dirt so that the entire root ball is covered but be careful not to cover much of the stem of the plant. Gently pack the dirt by pressing it with your fingers.
- Water until the soil is thoroughly wet.
NOTE: Remember to place a tray underneath to catch the drain water or you will have a mess to clean off the floor.
CREATIVE PLANTING POTS
 Anything that holds dirt and drains excess water can be used for a planting pot. This includes metal coffee cans (be careful when poking holes in metal cans), plastic milk jugs, 2-3 liter soda bottles, broken plastic food containers, old toys, hollow rocks, trash cans and children’s swimming pools.
 - The three most common planting containers are peat pots, clay pots and plastic pots. Peat pots come only in small sizes, 2-4 inches in diameter, and are the least expensive of the three. When transplanting from peat pots to other containers, you do not have to remove the plant from the peat pot. Instead, place the entire peat pot with plant in it into the hole in the soil of the new container. Clay pots have the advantage of looking better than plastic pots and absorbing more excess water but clay pots are usually the most expensive pots. When transplanting from a clay pot, you may not be able to tap it hard enough to loosen the root ball. Instead, use a large spoon to loosen dirt around the side of the pot until it slides free. Plastic pots are inexpensive and come in all sizes. You must be certain to have good drainage (which may mean poking more holes in the bottom than you will find in it when you purchase it) and to line the bottom with a layer of rock before filling with dirt. Use pieces of gravel or rock approximately 1-2 inches in diameter or length.
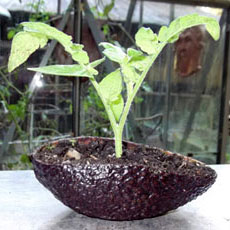 Avocado, orange and grapefruit skins make cute starting containers. Cut the fruit in half (avocado should be cut lengthwise) and let dry for a few days. Be sure to scrape out the excess fruit. To use, fill nearly to the top with soil; water; pour off excess water; and plant your seed. Like the peat pot, you can plant the entire fruit skin when transplanting to a larger container. The fruit skin will decompose over time.
- Stockings make a very creative planting container – called Sock Head. Place 2 cups of soil with a couple of pinches of grass seed mixed in, into the bottom of an old socking. Squeeze tightly and tie the ball of soil in place using the rest of the stocking or a string. Water the soil ball thoroughly. You can decorate the stocking by drawing a face on the stocking, putting on buttons for eyes and watching the grass grow in as the “hair". Hang in a sunny window and keep thoroughly moist.
Back to top